Why Are My Plant Leaves Turning Yellow?
Yellow leaves can make a plant owner want to change everything at once. That is usually the fastest way to lose the clue the plant is giving. A better diagnosis starts with where the yellowing appears and what changed recently.
Look at the soil, light, drainage, pests, roots, and the age of the leaf before adding fertilizer or water. Yellow leaves can mean stress, but they can also be part of normal growth. When symptoms spread or repeat, University of Minnesota plant disease guidance can help separate a simple care issue from a disease pattern.
Yellow leaves are useful only if the plant owner slows down enough to read the pattern. Location, timing, soil, light, and pests all matter before the next fix is chosen.
Plant diagnosis should make the next observation clearer. A beginner should know whether to check moisture, light, drainage, pests, roots, or older leaves before making another change.
Notice which plant leaves are turning yellow first
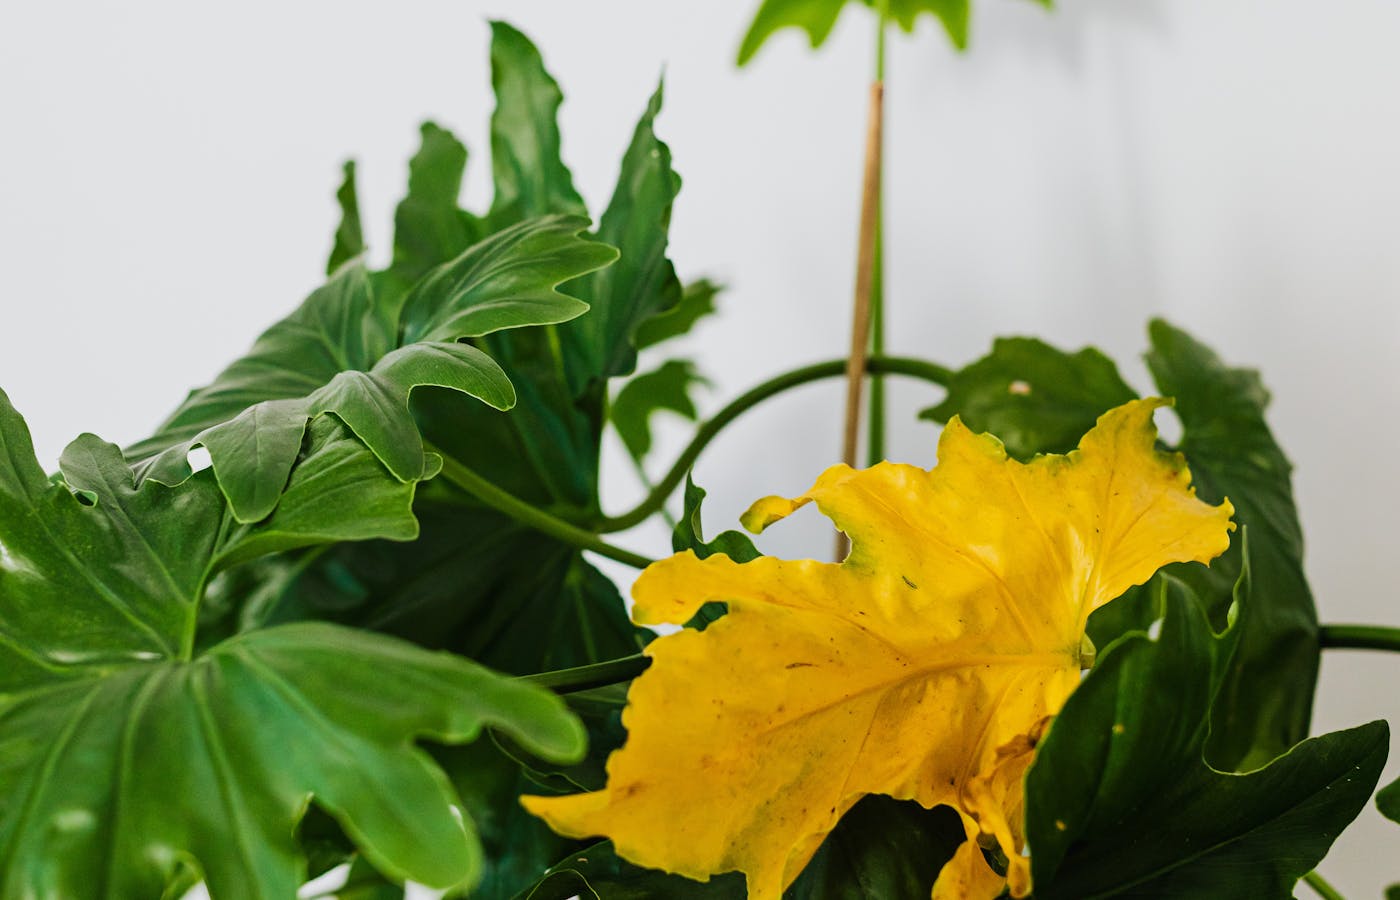
The location of yellow leaves matters. One older lower leaf turning yellow slowly may be normal aging. Several new leaves turning pale at the same time is different. Yellowing near the base, at the tips, or across the whole plant can point to different causes.
Do not judge the plant from one leaf alone. Look at new growth, stem firmness, soil condition, and whether the plant is still producing healthy leaves. A plant with one fading older leaf and strong new growth may not need a dramatic change.
The first clue is location. Yellowing on the oldest lower leaves often means something different from pale new growth at the top of the plant.
Notice which leaves are turning yellow: Beginner gardening improves when the next action is visible. The gardener should know whether to water, wait, prune, label, repot, harvest, or clean up without guessing from a vague rule.
Check soil moisture before adding water
Both overwatering and underwatering can create yellow leaves. That is why the soil check comes before the watering can. Push a finger into the soil or use a wooden skewer to see whether moisture remains below the surface.
Wet soil with yellow leaves can mean roots are not getting enough air. Bone-dry soil with wilting and yellowing points in another direction. Water only after checking below the top layer, because the surface can dry while the root zone stays wet.
Use the pot as evidence. A heavy pot with damp soil and yellow lower leaves needs a different response than a light pot with dry soil pulling from the edges. If you water both the same way, one plant may improve while the other gets worse.
Soil moisture should be checked below the surface. The top can look dry while the root zone is still wet, especially in deeper pots or cooler rooms.
The room also matters. A plant near a heater, cold window, or bright afternoon glass may dry unevenly even when the watering schedule looks consistent.
| Area | What to check |
|---|---|
| Wet soil | Pause watering and check drainage |
| Dry soil | Water thoroughly and watch recovery |
| Yellow lower leaf only | Check for normal aging |
| Yellow new growth | Review light, roots, nutrients, and pests |
Compare light changes with the timing
Plants react to light changes. A plant moved from bright light to a dim corner may drop or yellow leaves because it cannot support the same growth. A plant moved suddenly into strong sun may scorch or stress before adapting.
Think about timing. Did the yellowing start after moving the plant, changing curtains, shifting seasons, or placing it near a different window? Light problems are easier to fix when the timeline is clear.
Light changes often show up slowly. A plant moved away from a bright window may not complain the same day, but new leaves can become paler over the next few weeks.
Compare light changes with the timing: A simple habit is better than a perfect plan. Checking the same plant or tool after a few normal days teaches more than changing the whole setup at once.
Inspect roots and drainage when yellowing spreads
If yellowing spreads across the plant and the soil stays wet, check drainage. A pot without drainage holes, compacted soil, or a saucer that stays full can keep roots too wet. Roots need both moisture and air.
Healthy roots are usually firm. Rotten roots may look dark, soft, or smell bad. If you suspect root stress, avoid fertilizing right away. Fertilizer does not repair damaged roots and can add more stress to a plant that is already struggling.
Roots should be inspected gently when yellowing spreads despite careful watering. A sour smell, mushy roots, or a pot with no drainage changes the diagnosis quickly.
Inspect roots and drainage when yellowing spreads: Look for the cue that belongs to this section: leaf color, soil feel, root crowding, seedling size, tool comfort, or whether the plant is ready to harvest.
- Check that the pot has drainage holes.
- Empty standing water from saucers.
- Look for compacted soil that stays wet too long.
- Avoid fertilizing until root stress is ruled out.
Look for pests before fertilizing
Pests can cause yellowing by damaging leaves or draining plant energy. Look under leaves, along stems, at new growth, and near leaf joints. Fine webbing, sticky residue, tiny moving dots, cottony clusters, or stippled leaves can point to pest activity.
Isolate a plant if pests are likely. Wipe leaves, rinse gently, or treat according to the pest and plant type. Do not fertilize as the first response to a pest problem. Feeding the plant does not remove the insects causing the stress. Yellowing can also follow root stress, so low-stress repotting is useful when the plant recently changed containers.
Pests can make leaves yellow before they are obvious. Check the undersides of leaves, stem joints, and new growth before adding fertilizer.
Look for pests before fertilizing: The best beginner setup keeps cleanup easy. Soil, labels, gloves, trays, and watering gear should have a place to return to before the next garden session starts.
Treat older yellow leaves differently
Older leaves do not last forever. Many plants shed lower leaves as they grow, especially after a move, seasonal change, or new growth push. If the rest of the plant looks healthy, one older yellow leaf may simply be finished.
Remove fully yellow leaves when they come away easily or look unattractive. Do not strip many leaves at once unless they are dead or diseased. Leaves still provide energy while they remain partly green, so patience can help the plant recover.
Older yellow leaves do not always need rescue. If the rest of the plant is firm and growing, remove the spent leaf and keep watching for a pattern.
Treat older yellow leaves differently: When something goes wrong, change one condition first. Water, light, soil, spacing, pests, and tools can overlap, so a slow adjustment keeps the lesson clear.
Make one change and watch new growth
The biggest mistake with yellow leaves is changing water, light, soil, pot, fertilizer, and pruning all at once. If the plant improves, you will not know which change helped. If it declines, you will not know which change made things worse.
Choose the most likely cause and adjust that first. Then watch new growth for a couple of weeks when possible. Old yellow leaves may not turn green again, so the better sign is whether new leaves emerge healthier.
Give the plant a short observation window after each change. For many houseplants, 10 to 21 days is more useful than checking the next morning. Old yellow leaves may still drop, but new leaves, firmer stems, and steadier soil moisture tell you whether the direction is improving.
One change at a time protects the clue. Adjust watering, light, potting mix, or pest treatment separately so you can see what actually helped.
A dated photo can help more than memory. Take one picture before the change and another from the same angle later, then judge the newest growth rather than the oldest damaged leaf.
- Identify the most likely cause.
- Change only one care factor.
- Remove dead leaves if needed.
- Watch new growth before changing the plan again.