How to Use a Moisture Meter for Plants
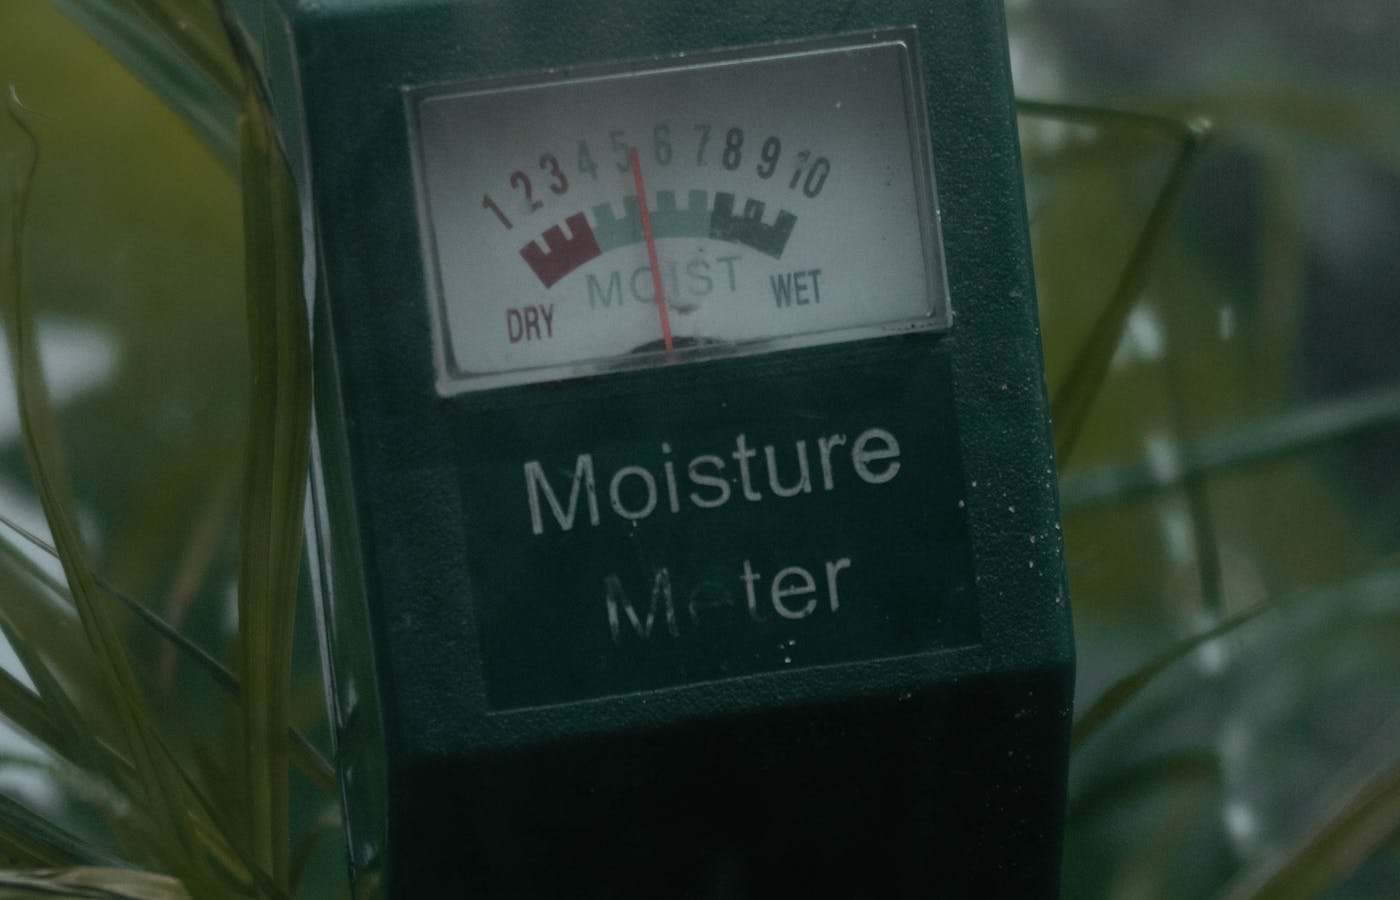
A moisture meter can make plant care feel calmer, but only if you treat the reading as information instead of a command. The tool measures moisture near the probe, not the entire pot, and that small difference explains many confusing results.
Learning how to use moisture meter for plants is really about asking better questions before you water. Where is the probe sitting? Is the pot deep or shallow? Does the plant like to dry down, or does it prefer steady moisture? The number on the dial matters, but the context around that number matters just as much.
A moisture meter should help you slow down. It gives you a reason to check the soil before reaching for the watering can, especially with plants that suffer when people water on a fixed calendar.
Use the moisture meter as a second opinion
A plant moisture meter is most useful when it supports what you already see and feel. If leaves are firm, the pot still feels heavy, and the meter says the soil is wet, the message is clear: wait. If the leaves are drooping, the pot feels light, and the meter reads dry in several spots, watering is easier to justify.
The trouble starts when the meter becomes the only thing you trust. A cheap probe can read strangely in chunky bark, very dry peat, compacted soil, or pots with uneven moisture. One pocket of damp soil near the probe can make the meter look more optimistic than the roots actually are.
I like to think of the meter as a check against habit. Many plant problems begin because the owner waters every Saturday, not because the plant asked for water. A meter interrupts that routine and forces a quick look at the soil before anything is poured.
Use the tool together with pot weight, leaf texture, recent weather, room temperature, and plant type. That combination gives you a practical answer. The meter gives a clue; the plant and pot tell the rest of the story.
Insert the probe in the right part of the pot
Probe placement changes the reading. Push the probe into the soil away from the exact stem base, because that area can be awkward, woody, root-heavy, or protected by a dense crown. Aim for the root zone instead: not pressed against the pot wall, not scraping the bottom, and not sitting only in the top layer.
For a small houseplant, insert the probe a few inches down if the pot allows it. For a deeper container, test lower than the surface because the top inch can dry while the middle of the pot is still damp. That difference is one reason people overwater large pots with dry-looking surfaces.
Move slowly when you insert the probe. Forcing it through roots can damage the plant and can also bend the tool. If you feel firm resistance, pull back and choose a nearby spot. The goal is to reach soil, not to stab through the root ball as if the meter has to win an argument.
Test more than one area when the pot is large, oddly shaped, or planted with a dense mix. One reading near the front edge may not match the back of the pot, especially if light, airflow, or watering habits dry one side faster than the other.
Read dry, moist, and wet as ranges
Most analog meters use a simple dry, moist, and wet scale. That looks easy, but the reading is not universal for every plant. A succulent that reads moist may need more waiting. A fern that reads lightly moist may be ready for water sooner. The same number can mean different things depending on the plant.
Use the scale as a range instead of chasing one exact point. Dry usually means the soil near the probe has little available moisture. Moist suggests the plant still has water access. Wet means water is still present enough that watering again could be risky for many indoor plants.
| Meter area | What it usually means | Practical next step |
|---|---|---|
| Dry | The tested soil is low on moisture. | Check the plant type, then water if the pot also feels light. |
| Moist | The root zone still has usable moisture. | Wait for plants that prefer drying, or monitor moisture-loving plants. |
| Wet | The tested soil is still holding plenty of water. | Do not water; check drainage, airflow, and pot weight. |
A surprising reading deserves a second check before it deserves water. If one side reads dry and another reads wet, the pot may have uneven soil, poor drainage, or a watering pattern that misses part of the root zone. That finding is useful because it points to technique, not just timing.
After a few weeks, you will start recognizing the normal range for each plant. That is where the tool becomes more helpful than a generic watering schedule.
Match the reading to the plant and pot
A moisture meter does not know whether it is sitting in a cactus pot, a peace lily pot, or a basil container. You still have to match the reading to the plant’s water preference. Some plants want the mix to dry noticeably between waterings, while others decline when the root zone stays too dry for long.
Pot size also affects the decision. A large ceramic pot can stay wet deep inside long after the surface looks dry. A small terracotta pot near a bright window can dry quickly. Two plants with the same meter reading may need different choices because their containers behave differently.
Soil mix matters too. A chunky orchid-style mix may not contact the probe evenly. A dense, peat-heavy mix may hold water in the center while the top dries. A fresh, airy potting mix usually gives more consistent readings than old compacted soil.
- Let succulents and cacti move farther into the dry range before watering.
- Keep moisture-loving tropical plants from staying fully dry for too long.
- Check deep pots lower in the root zone, not only near the surface.
- Compare the reading with pot weight before watering large containers.
- Be extra cautious when a decorative outer pot has no drainage hole.
The meter helps most when it is tied to the plant in front of you. A number without plant context can still lead to the wrong watering choice.
Avoid common moisture meter mistakes
The biggest mistake is watering every time the meter leaves the wet range. Many plants do not need water just because the soil is no longer wet. For several indoor plants, moist soil is still plenty. Watering too soon can keep roots short of oxygen and create the conditions for rot.
Another mistake is testing only the top inch. The top can dry fast from light and indoor air, while deeper soil stays damp. If the plant is in a deep pot, a shallow reading can trick you into watering before the lower root zone is ready.
Do not leave the probe stuck in the soil all week unless the tool is designed for that use. Many basic meters are meant for quick checks. Leaving the probe in wet soil can corrode it, affect readings, or make the tool less reliable over time.
- Do not water based on one surprising reading.
- Do not force the probe through hard roots or compacted soil.
- Do not use the meter in standing water at the bottom of a cachepot.
- Do not compare every plant to the same ideal number.
- Do not ignore yellowing leaves, soft stems, or a sour soil smell.
If the plant looks worse even when the meter says your watering is fine, widen the inspection. Light, drainage, temperature, pests, fertilizer, and root condition can all create symptoms that look like a watering problem.
Clean and store the probe after each use
A clean probe gives more trustworthy readings. Soil salts, fertilizer residue, and sticky potting mix can coat the metal and interfere with contact. Wipe the probe after each plant, especially if you are moving from one pot to another. This small habit also avoids carrying damp soil or possible disease issues between plants.
Use a soft cloth or paper towel for ordinary cleaning. If residue is stubborn, wipe gently with a damp cloth and dry the probe before storing it. Avoid harsh scrubbing that scratches the metal or damages the tool. The probe should be clean enough to make direct contact with soil next time.
Store the meter somewhere dry, upright, and easy to find. If it disappears into a drawer under gloves and plant ties, you will stop using it before watering. A tool that lives near the watering can is more likely to become part of the routine.
Check the meter occasionally against common sense. If it reads wet in dry, loose soil or dry in clearly soaked soil, the probe may be dirty, damaged, or poorly suited to that mix. A moisture meter is helpful, but it should still earn your trust.
Build a simple watering check routine
The best routine is short enough to repeat. You do not need to test every plant every morning. Group plants by water preference, check the ones that usually dry first, and use the meter when your eyes and hands are giving mixed signals.
A weekly rhythm can work for many beginners as long as the meter decides whether water is actually needed. In warm, bright periods, check more often. In cooler or darker months, expect many plants to stay moist longer. The tool helps you adjust without memorizing a different calendar for every pot.
- Look at the leaves and soil surface first.
- Lift the pot if it is small enough to judge weight.
- Insert the probe into the root zone, away from the stem.
- Wait for the dial to settle before reading it.
- Test a second spot if the pot is large or the result seems odd.
- Water only when the plant type and reading agree.
- Wipe the probe clean before putting it away.
Used this way, the meter does not replace judgment. It reduces guesswork. When the tool, the pot, and the plant all point in the same direction, watering becomes a cleaner decision and your plants are less likely to suffer from automatic overwatering.